Recategorize, edit and move transactions
When You Might Need to Adjust a Category
While Kick automates most categorization, some transactions require user context to categorize correctly. This includes:
Mixed-Purpose Transactions - A purchase that includes both business and personal expenses or should be split to reflect more than one single category.
New or Uncommon Transactions – If Kick hasn’t seen a similar transaction before, it may require manual categorization.
Loan Payments – These may need to be split between principal, interest, or other accounts.
Uncategorized Transactions - If Kick doesn’t have enough data to assign a category, you’ll need to manually select the right one.
How to Review & Change Your Categorized Transactions
Even though your transactions are automatically categorized in Kick, it’s important to review them to ensure accuracy.
A quick review helps prevent errors, maximize tax deductions, and keep your reports reliable.
Review & Recategorize Single Transactions
Here’s how to review and change a categorized transactions:
Go to the Transactions Tab
Navigate to your list of categorized transactions.
Scan for Inaccuracies
Look for any misclassified transactions, like a software subscription categorized as an office supply.
Recategorize if Needed
If a transaction is incorrect, update it to the correct category by clicking on the current category and choosing the correct one from the drop down menu. Review & Categorized Uncategorized Transactions
When a transaction is marked as "Uncategorized," it means Kick couldn’t automatically determine the correct category. Reviewing and categorizing these transactions ensures your financial reports stay accurate.
Find “Uncategorized” transactions
Go to Transactions and filter by Uncategorized to see a list of transactions that need review.
Assign the Correct Category
Click on an uncategorized transaction and select the appropriate category from the dropdown list.
Create a Rule for future transactions
If the same type of transaction appears frequently, create a Rule to automatically categorize it in the future.
Bulk Update Categories
Manually updating transactions one by one can be time-consuming, but bulk updating allows you to make changes quickly and efficiently.
Whether you need to reclassify multiple expenses, change the entity of multiple transactions, move past and future transactions from personal to business, or even edit Customers and Vendors, bulk editing helps keep your books accurate with minimal effort.
There are two ways to bulk update transactions within Kick.
Batch Category Update
Rules-Based Categorization
Batch Update Categories
Batch editing categorization allows you to select multiple transactions and update them via the transactions page.
Filter & Select Transactions
Use search and filters to find transactions that need updating. For example, all transactions from a specific vendor.
Batch Categorization
Select multiple transactions and assign them to a new category in one step.

Rules-Based Categorization
Set up rules so both past and future transactions from the same vendor are automatically categorized correctly.
Here’s how you can create rules to bulk edit past and future transactions:
Go to Rules page.
Navigate to Rules by clicking on Transactions → Rules or you can go directly through here: https://use.kick.co/rules
Add Rule
Click “Add Rule” in the top right corner.
Choose conditions
Make the proper entity selection. Remember the transactions you are creating a rule for will correspond to the entities you choose here.
Sort transactions.
In this example, we’re sorting based on bank description. One thing to note is that you can also sort by amount. A simple example is sorting by any amount over $0 or below $0.
Review transactions.
The transactions that meet the criteria conditions you’ve entered will appear on the right side.
Select the Rule Action.
In this example, we’re setting a rule so that any transaction matching a specific bank description will automatically get assigned to the category we’ve chosen.
Move a Transaction Between Entities
If you run multiple businesses or have separate financial entities, you may occasionally need to move a transaction from one entity to another.
Move a Single Transaction
Find the Transaction
Click on the transaction you want to move.
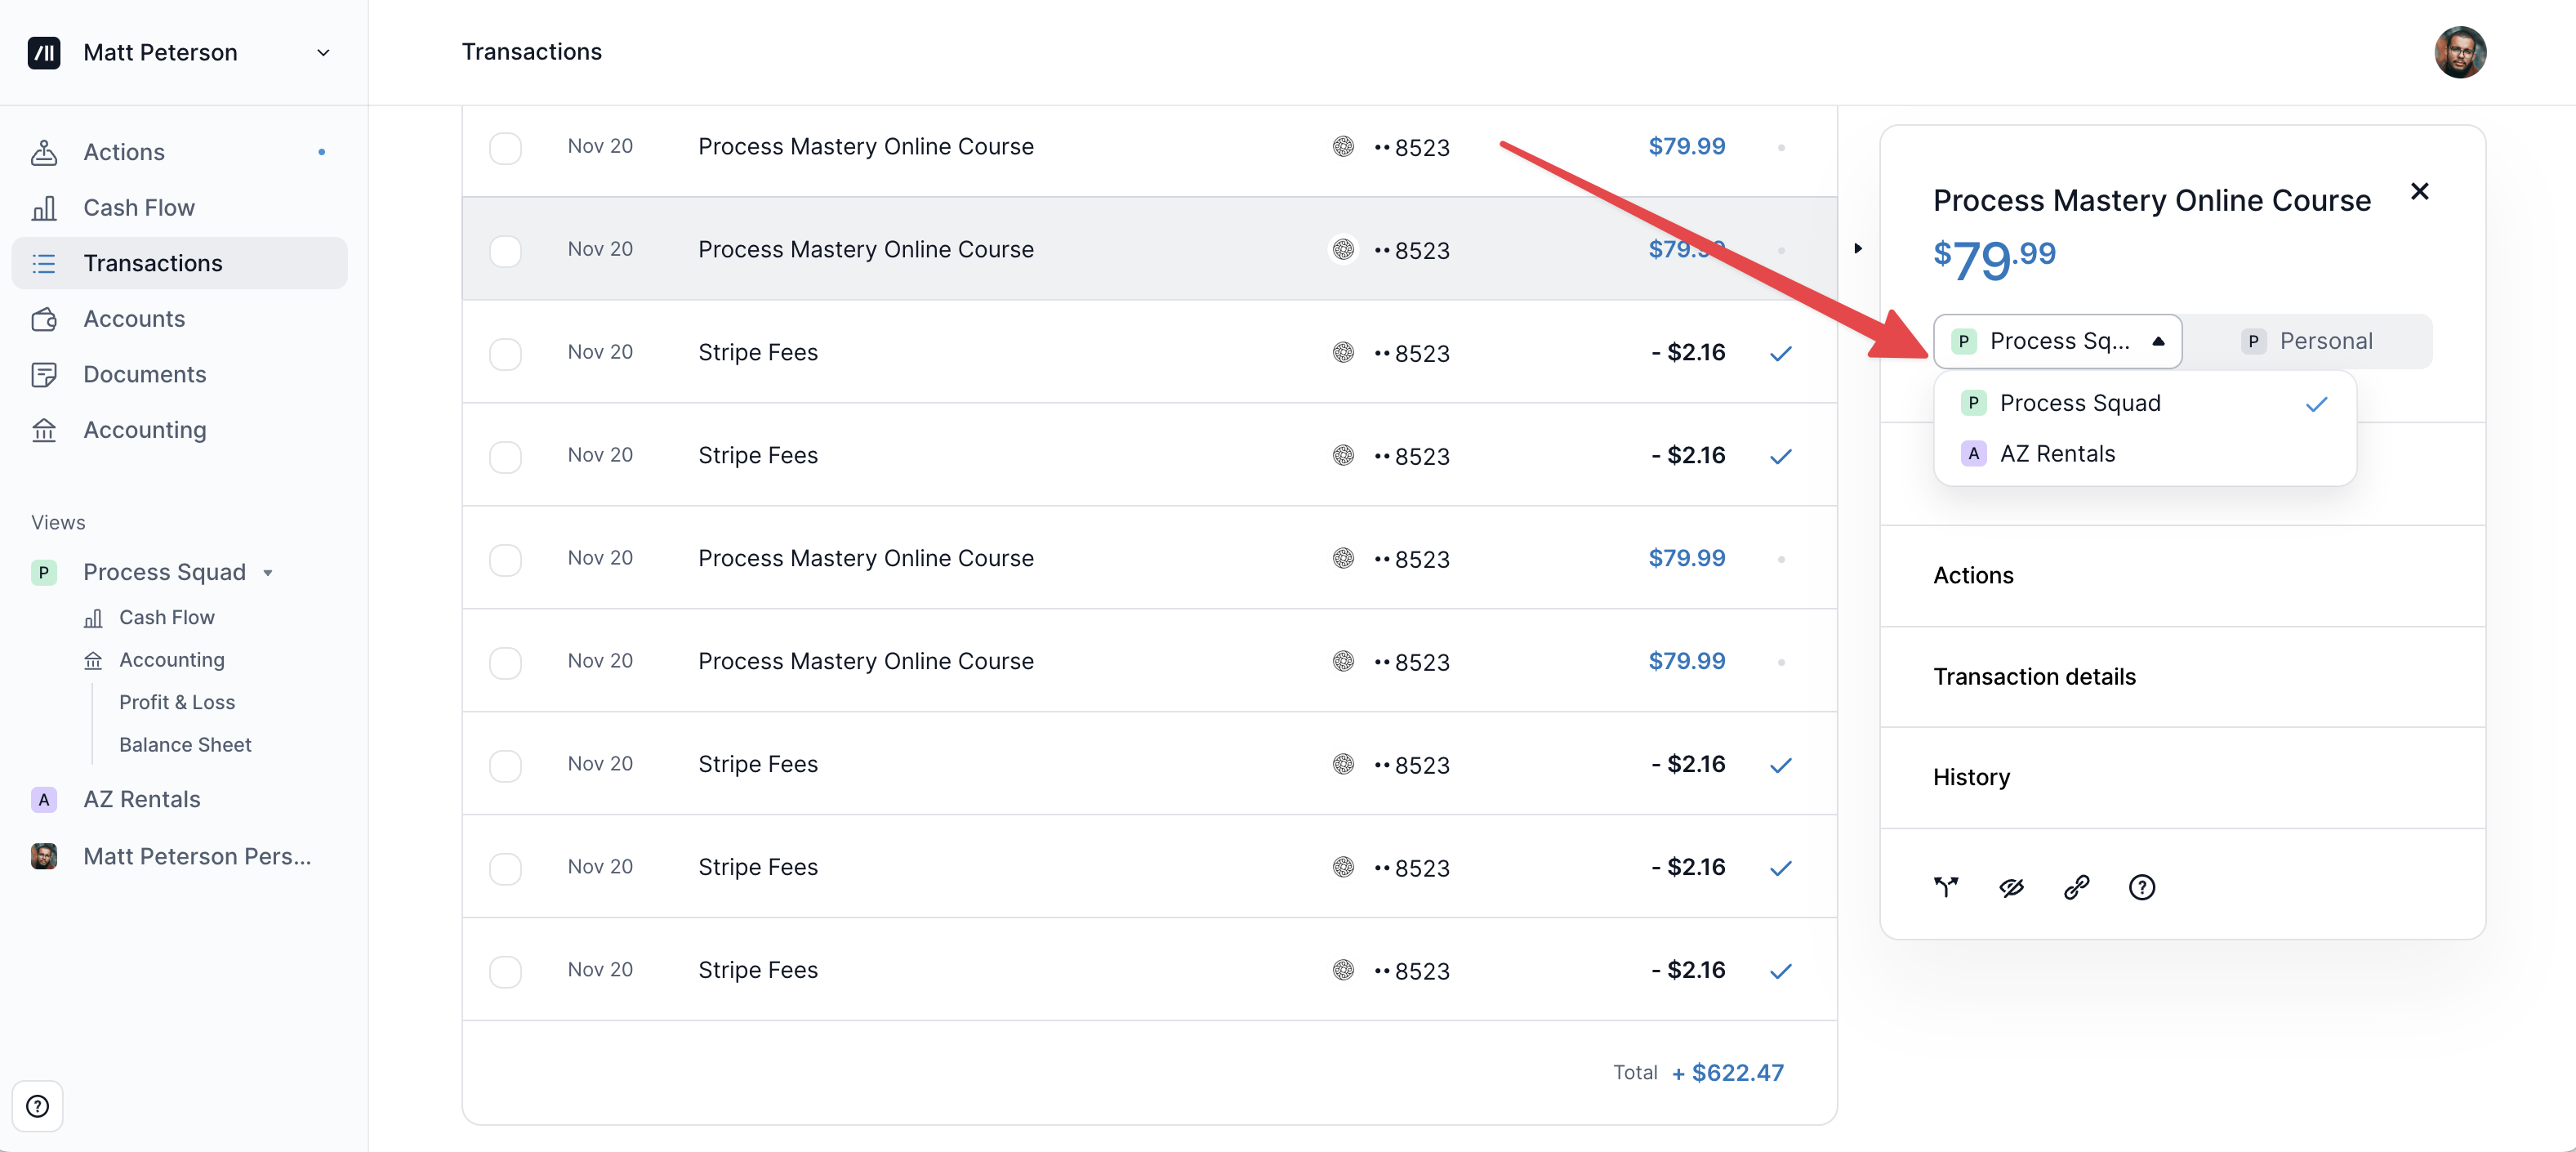
Change the entity
From the dropdown, you'll just change the entity the specific transaction is associated with. This can be done for any transaction type (expenses, income, contributions/distributions, loan payments, etc.).
Move a Personal Transaction to Business
If you paid for a business expense with a personal card, properly recording it as a business expense allows you to claim tax deductions and maintain clean financial statements.
Move a Single Transaction
This workflow is ideal for one-off transactions. For example, if you’re reviewing your transaction and notice a single transaction that needs to move over.
Locate the Transaction On the transactions tab, review the personal transaction that should be categorized as a business expense.
Reclassify the Transaction Click on the current “Personal” category to open the category options, then select the appropriate business expense category.
Assign the expense to an entity Click on the entity icon on the right side of the transaction. Choose the entity you’d like to move the expense to.
Move or Recategorize Personal to/from Business Transactions in Bulk
If you’d like to move or recategorize more than one transaction at a time, there are two options. You can move multiple transactions from personal to business is by batching the move on the transactions page or creating a rule.
Bulk Modify Transactions
One way to move multiple transactions from personal to business is by batch editing them on the transactions page.
Find & Select Transactions
Use search and filters to find transactions that need updating. Select them all.
Batch Recategorize
Assign them to a new category in one step.
Assign to Entity
Select the entity to assign these transactions to.
Use Rules to Bulk Move Personal Expenses to Business
Set up rules so both past and future transactions are automatically moved from personal to business expenses.
Here’s how you can create rules to move past and future transactions:
Go to Rules page.
Navigate to Rules by clicking on your name in the top left corner. The find “Rules” under Workspace.
Add Rule
Click “Add Rule” in the top right corner.
Choose conditions
Since we’re creating a rule to move personal expenses to business expenses, make sure your personal entity is selected.
Sort transactions.
In this example, we’re sorting based on bank description.
Review transactions.
The transactions that meet the criteria conditions you’ve entered will appear on the right side.
Select the Rule Action.
In this example, we’re recategorizing a personal expense to a business expense and assigning it to an entity.
How to Add a Note in a Transaction
Go to your Transactions and click on the transaction that you want to add a note to.
At the right sidebar, click on Actions.
Click Add note and type in your note.
Click anywhere else on the screen to save your note.
How to Remove a Vendor/Customer in a Transaction
Go to your Transactions and click on the transaction that you want to edit.
At the right sidebar, click on Transaction Details.
Under Vendor/Customer, click Edit.
Hover over the checkmark beside the Vendor/Customer and it should change to an X.
Click on the X button to remove the Vendor/Customer from this transaction.