Step 3: Personalize
Step 3: Personalize your account
Learn how to personalize your Kick account to streamline your workflow from day one. Start with the steps below or go through our tutorials and instructional videos at our Help Center: help.kick.co.
1. Adjust a Category
Kick automatically categorizes your transactions, but you can manually change a category if needed. Making this modification is simple and intuitive.
Give it a try:
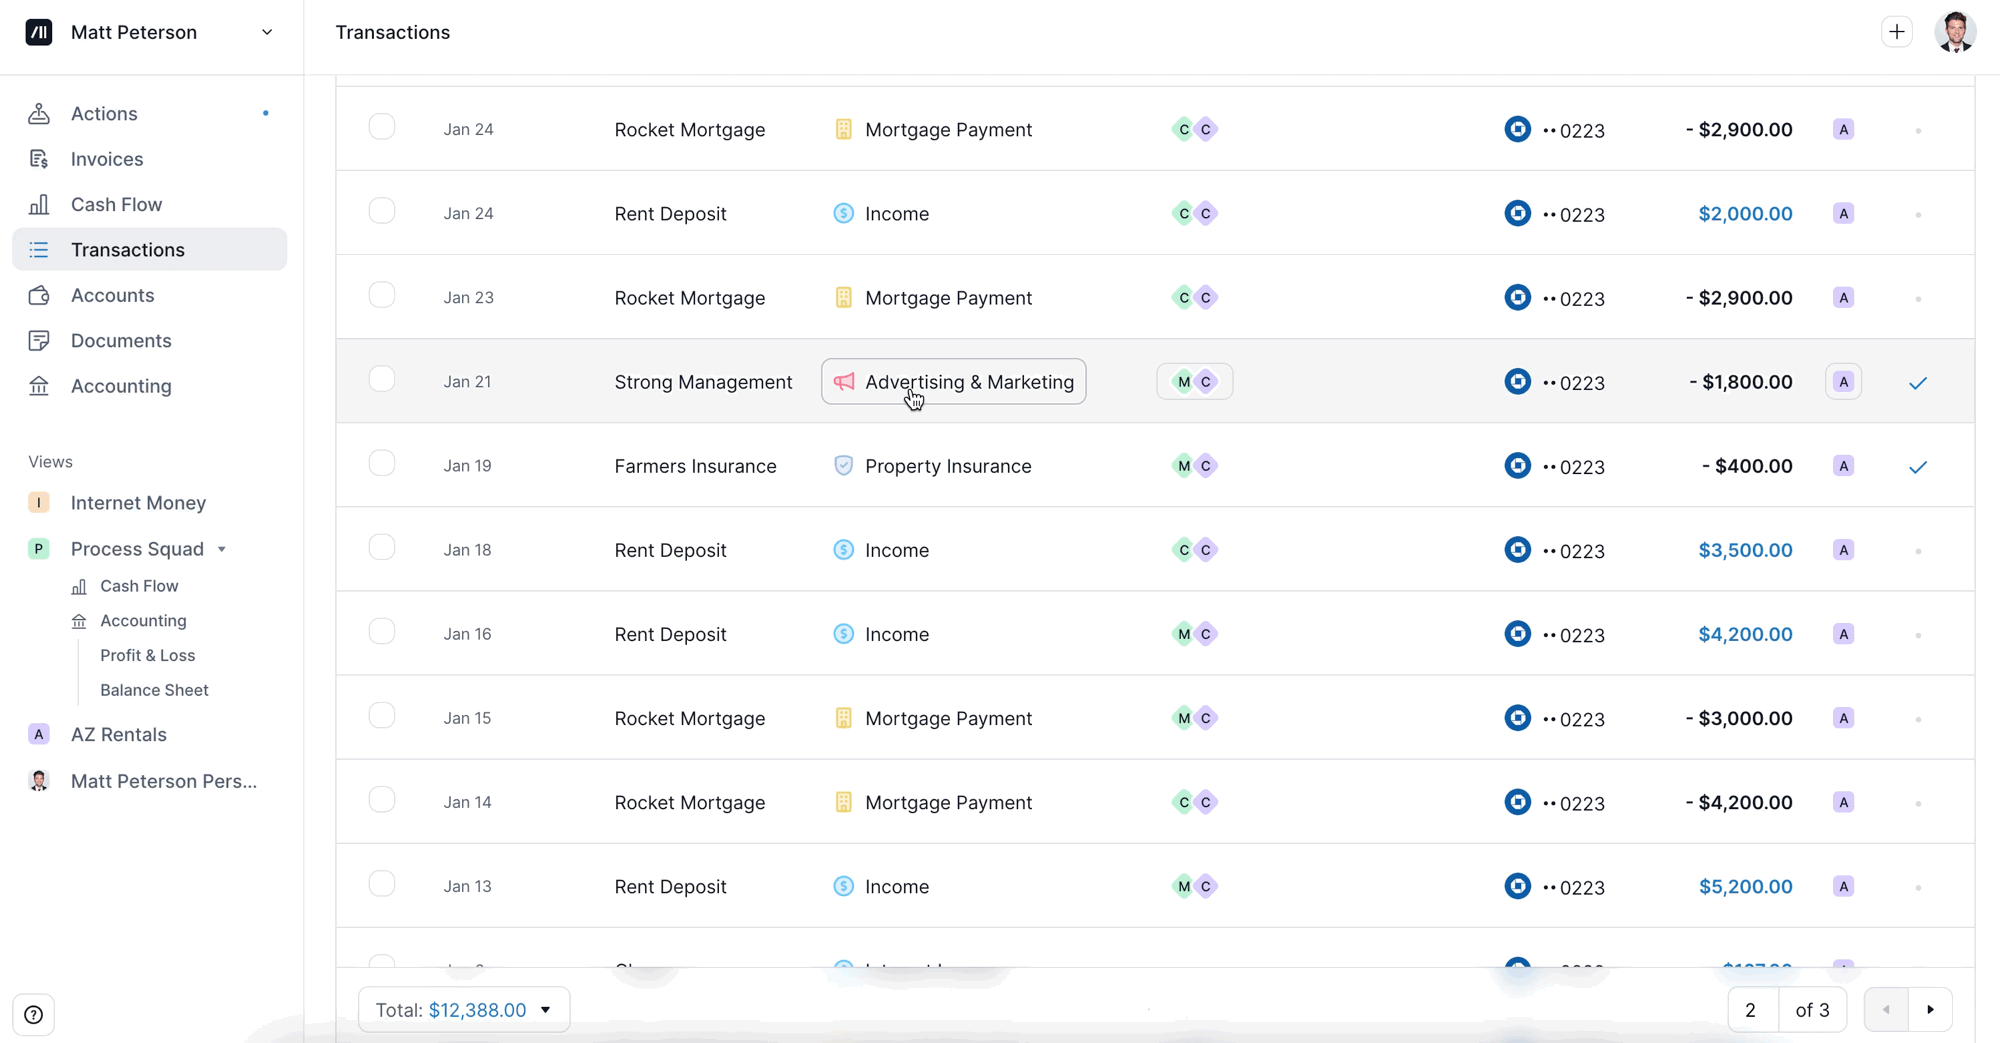
View your transactions by clicking on the Transactions tab in the Sidebar.
Change a transaction category in-line by clicking on the current category to bring up the full list. Or, click into the transaction line to bring up more details - here you can change the category, or even assign this transaction to a different entity.
2. Suggested Rules
Intro to Rules
The best way for Kick to learn from any categorization changes you make is to create a Rule.
Rules ensure that Kick will accurately categorize future transactions for you, further personalizing your bookkeeping experience.
Give it a try:
As you change a transaction’s category, Kick will make suggestion on Rules to create in your workspace to further automate your bookkeeping.
Click on Review to review the rule and make any adjustments.
Review the Conditions and Actions and make any adjustments to the rule.
Create Rule by clicking on the “Create Rule” button in the right corner.
→ Jump to learn more about Rules
3. Move a Personal Transaction to Business
Overview
If you paid for a business expense with a personal card, properly recording it as a business expense allows you to claim tax deductions and maintain clean financial statements.
Give it a try:
Locate the transaction the personal transaction that should be categorized as a business expense on the transactions tab.
Reclassify the transaction by clicking on the current “Personal” category to open the category options, then select the appropriate business expense category.
Assign the expense to an entity by clicking on the entity icon on the right side of the transaction. Choose the entity you’d like to move the expense to.
You can also do the inverse of this: moving business expenses to personal for any personal transactions that might have accidentally occurred within your business accounts. Simply edit the entity and category to personal.
4. Add Another Entity
You can add as many entities as you’d like to your Kick account with our Plus plan.
By adding all your entities, you can see your full financial picture, across your businesses, all in one place. This makes your bookkeeping and reports tailored to your unique situation.
Give it a try:
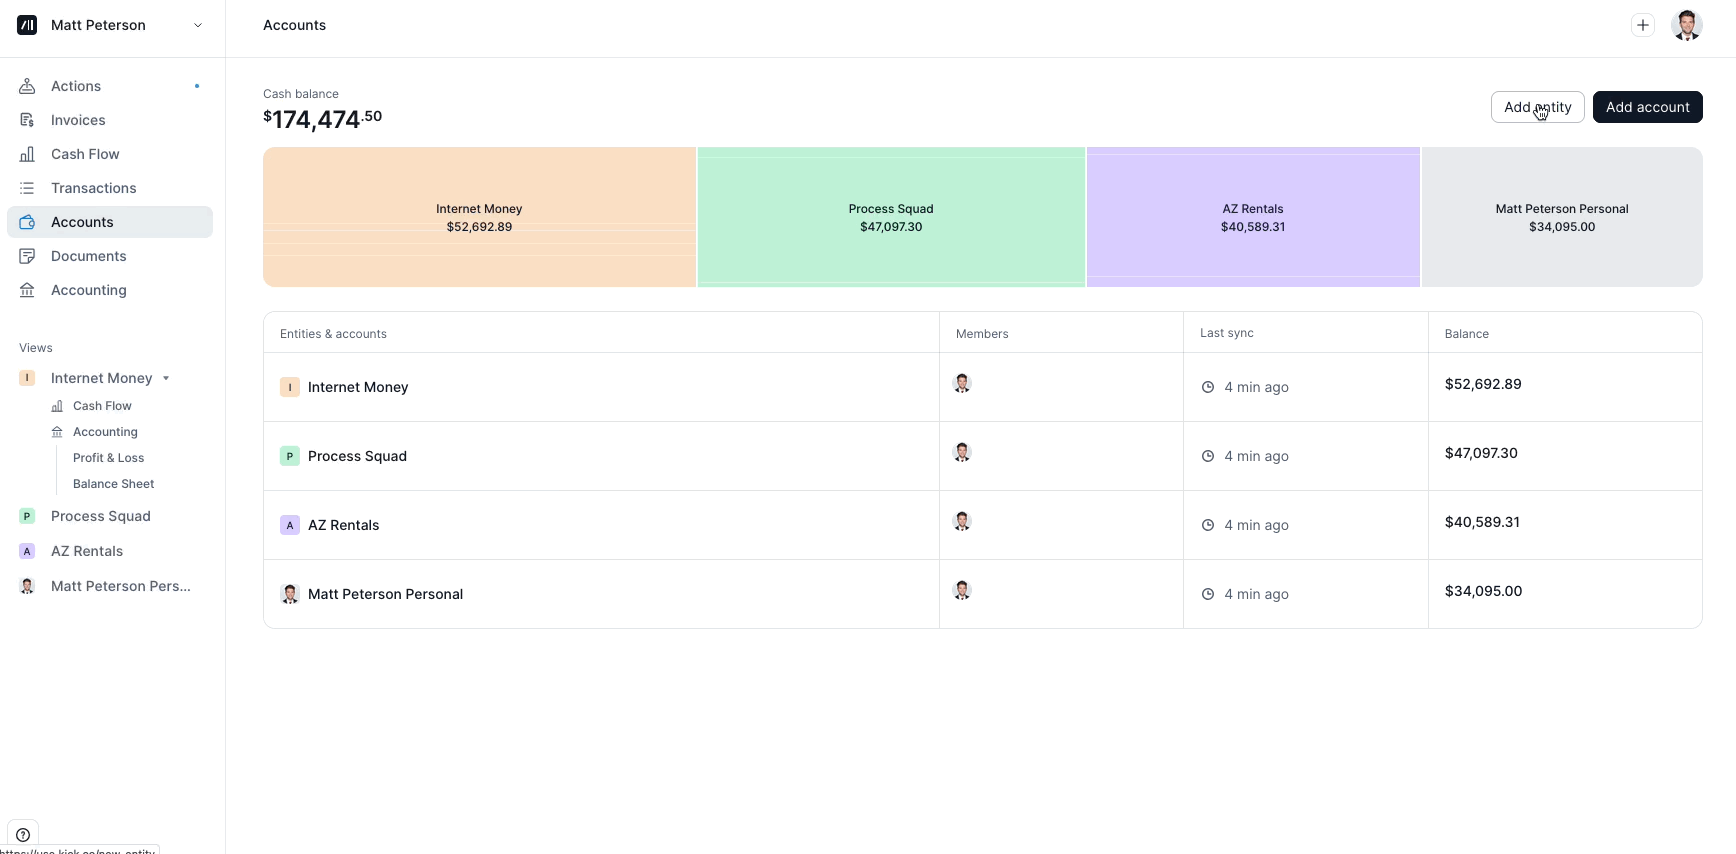
Navigate to the Accounts tab in the Sidebar or by going to http://use.kick.co/accounts.
Click on the Add Entity Button in the upper right corner.
Next Steps: Explore Tutorials
1. Create a Custom Category
Reveal financial insights by creating custom sub-categories to better track income and expenses.
→ Jump to Create a Custom Category
2. Receipt Matching
Set up automated receipt matching to automatically attach receipts directly to transactions for accurate record-keeping.
→ Jump to Automated Receipt Matching
3. Financial Reports
Generate real-time financial reports to track business performance, monitor cash flow, and prepare for taxes.
→ Jump to Financial Reports & Insights