Members
The Members feature allows you to invite team members, Accountants, Bookkeepers, or business partners to your workspace while maintaining control over access and permissions. Each member can be assigned a role with specific permissions to ensure they have the appropriate level of access to financial data and account settings.
How to Manage Members in Kick
Invite, remove, and manage workspace members so that each user has the appropriate level of access to financial data.
Navigate to the Members Section
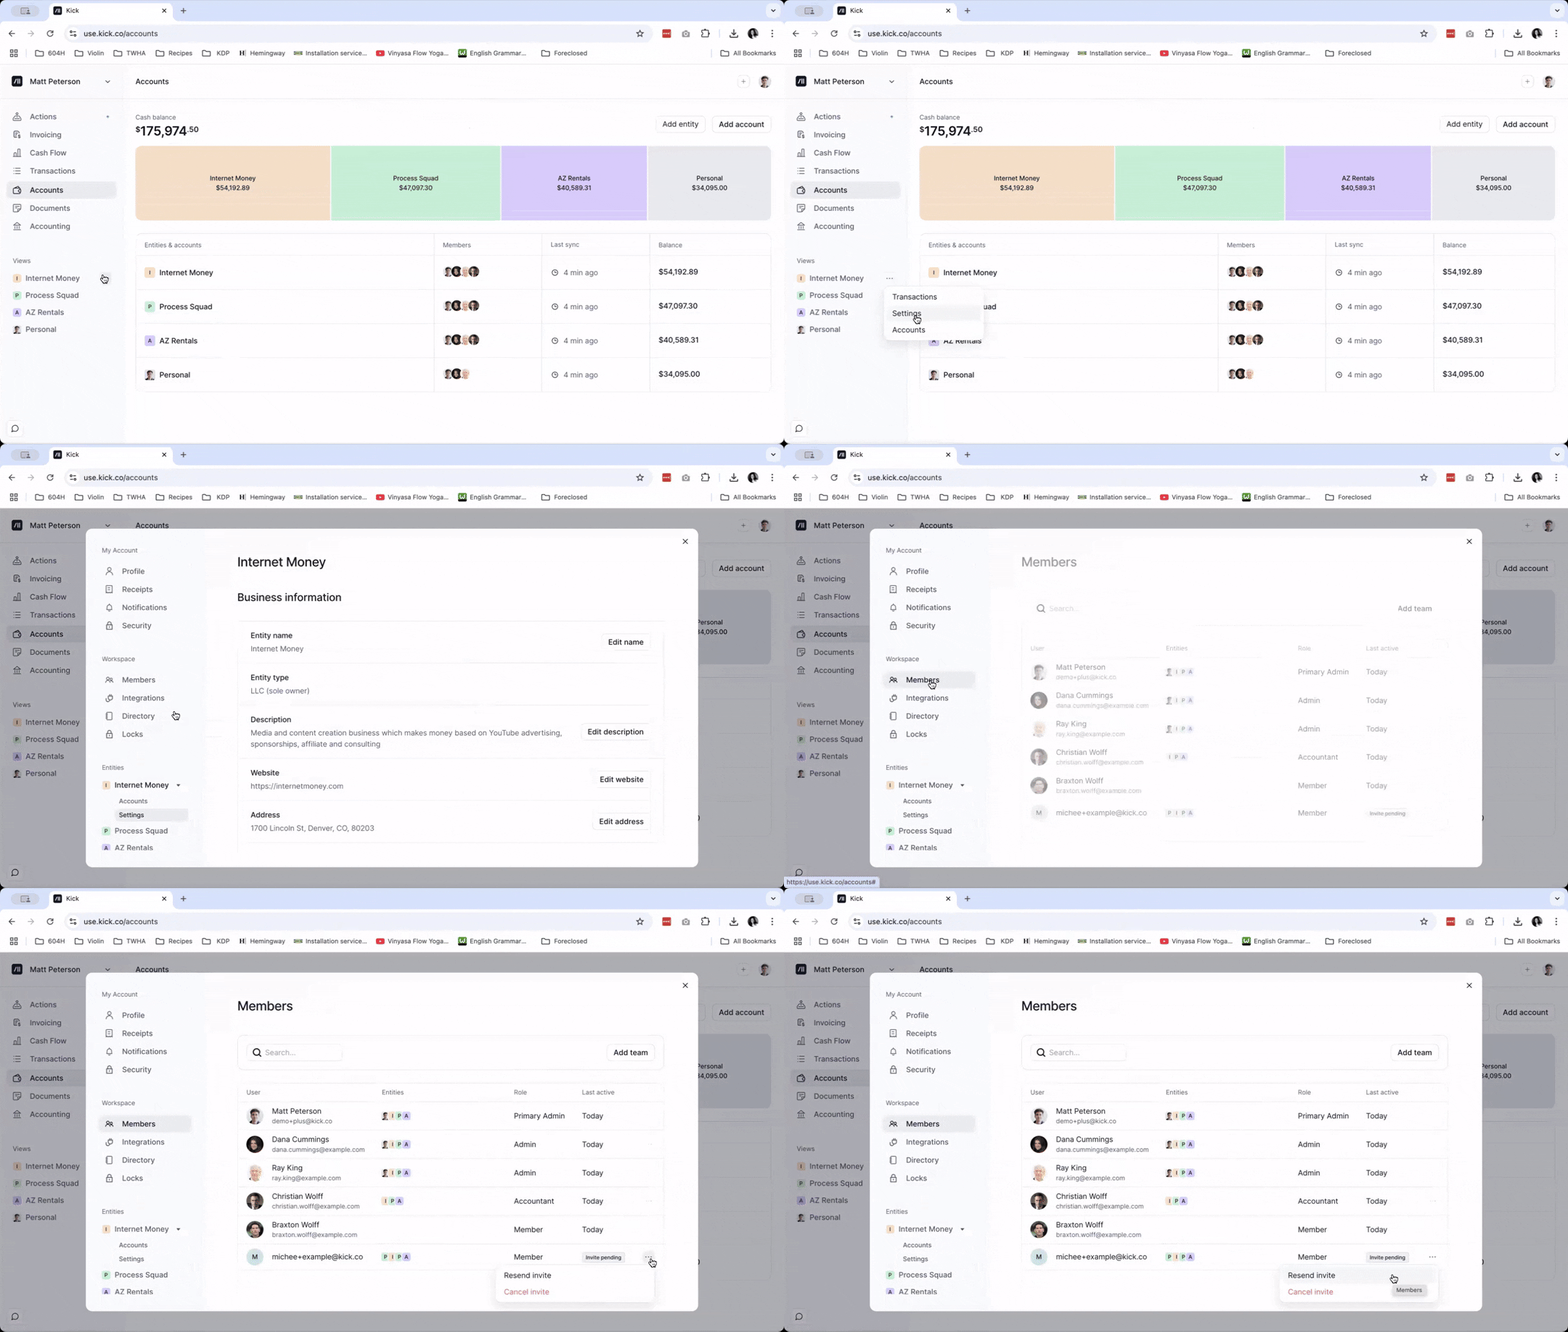
Navigate to your Profile Icon located at the top right corner of your screen → Workspace → Members to see your current team members.
Add a New Member
Click “Add Member” in the top right corner and enter their email address.
Set Member Workspace Permissions
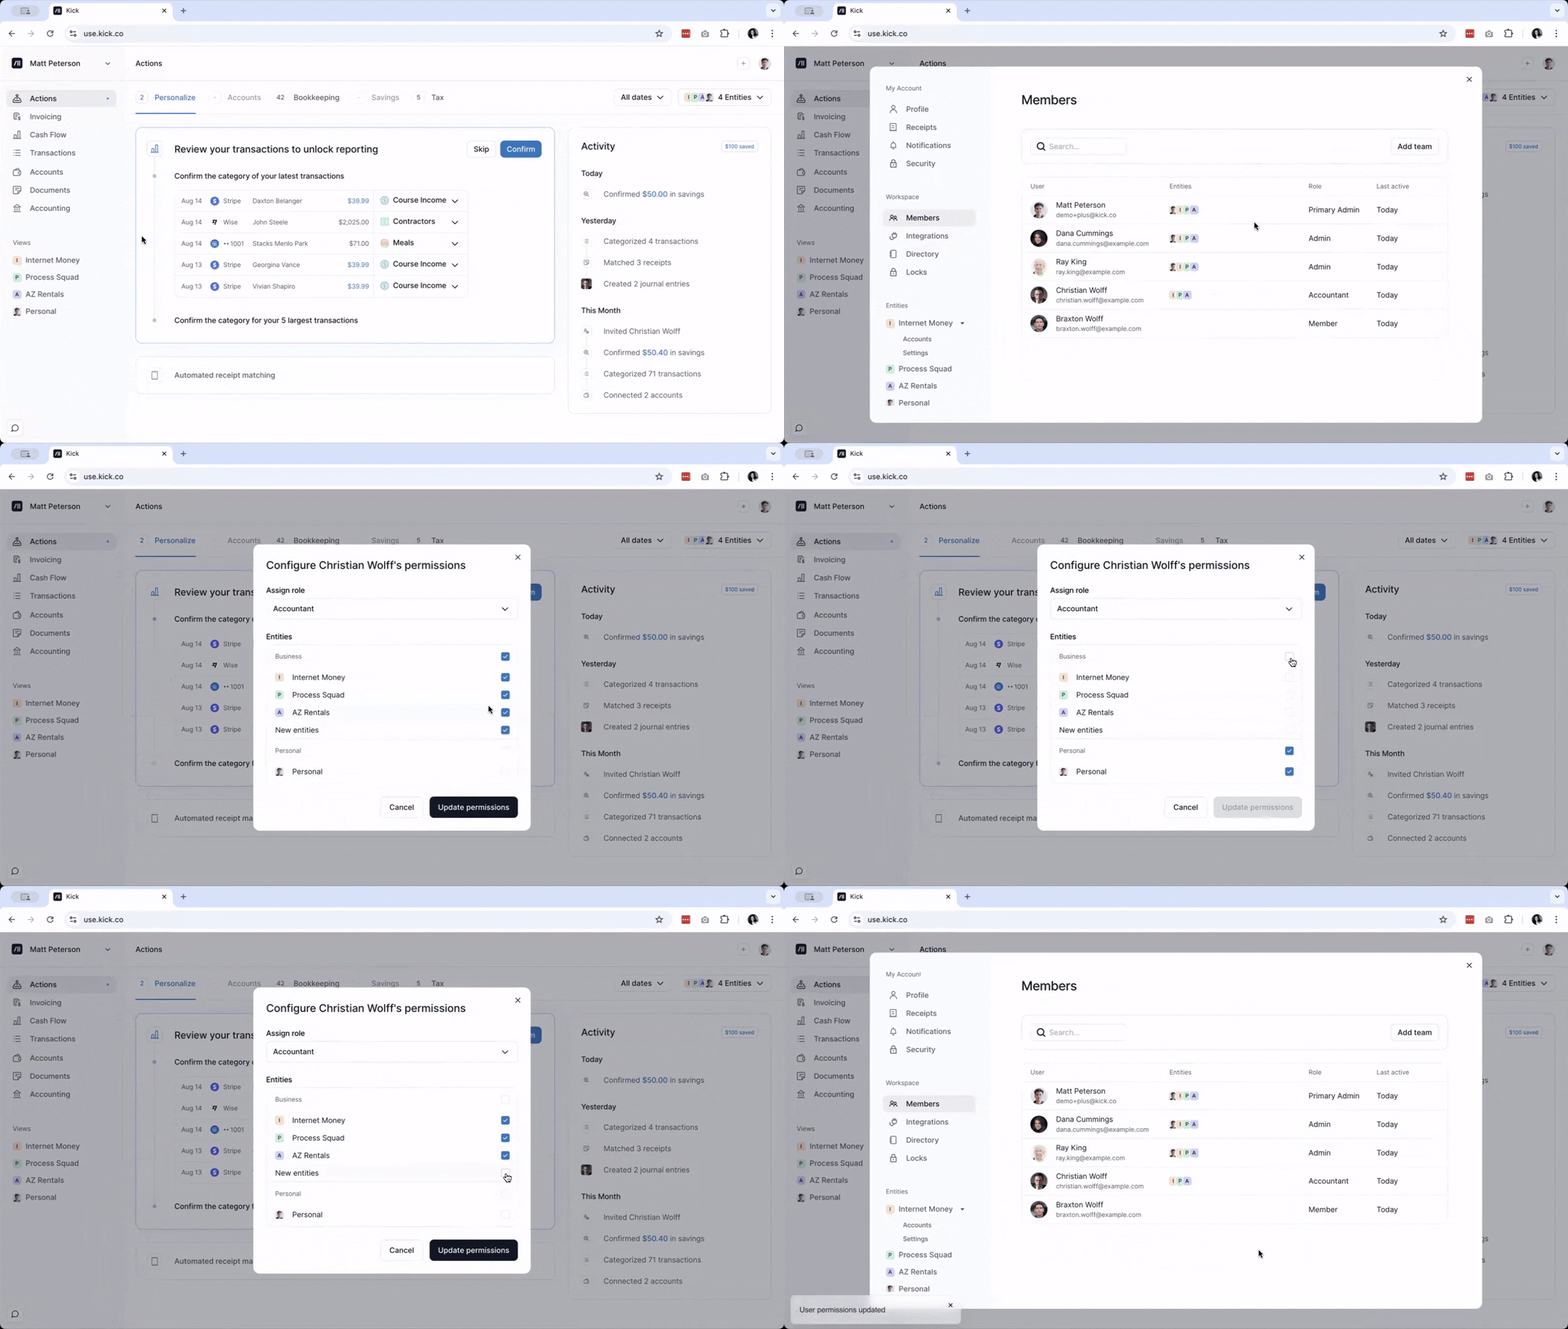
Choose the appropriate Workspace role and permissions sending the invite. By picking ”Member”, you can assign custom permissions on entity level below.
Set Entity Workspace Permissions
Check the entities the new member should have access to. Then choose the appropriate role and permissions.
Change or Delete a Member’s Access
By default, Admins would always have access to all Entities, including your Personal account. You can only configure the access for Accountants and Members.
To do this, click on the the 3 dots beside any Entity, then click on Settings → Members, select a user and adjust their permissions or remove access by selecting the member and clicking on the three dots to the right. Once done, click on Update Permissions.
Different Member Roles
Admin
Can add accounts, manage members, and have full access to transactions and reports.
Accountant
Can view reports, upload and download documents and invite other team members.
Member
Can view transactions and reports, upload and download documents and add notes.
How to Resend Member Invites

Click on the ellipsis menu button beside the Entity that you added your member into.
Click on Settings, then Members.
Click on the ellipsis menu button beside Invite Pending and click on Resend Invite.
Why would I need to add members?
Adding members to your Kick account allows others to help you manage your transactions and finances. For example, you can invite your accountant or bookkeeper so you’re all working on the same platform with the same data, making reconciliation and tax reviews more efficient. You can also add an assistant to help track missing information, like receipts, or support you in categorizing transactions and other tasks.
