Automatic receipt matching
Kick allows you to automatically match receipts to transactions in three ways: text message, email forwarding, or manual upload. This ensures all expenses have proper documentation for tax and record-keeping purposes.
Getting Your Account Setup for Automatic Receipt Matching
You can enable automatic receipt matching in a few different ways - via text, email, or by manually uploading receipts in the Documents tab. Use whichever method works best for you, or combine them for more complete coverage.
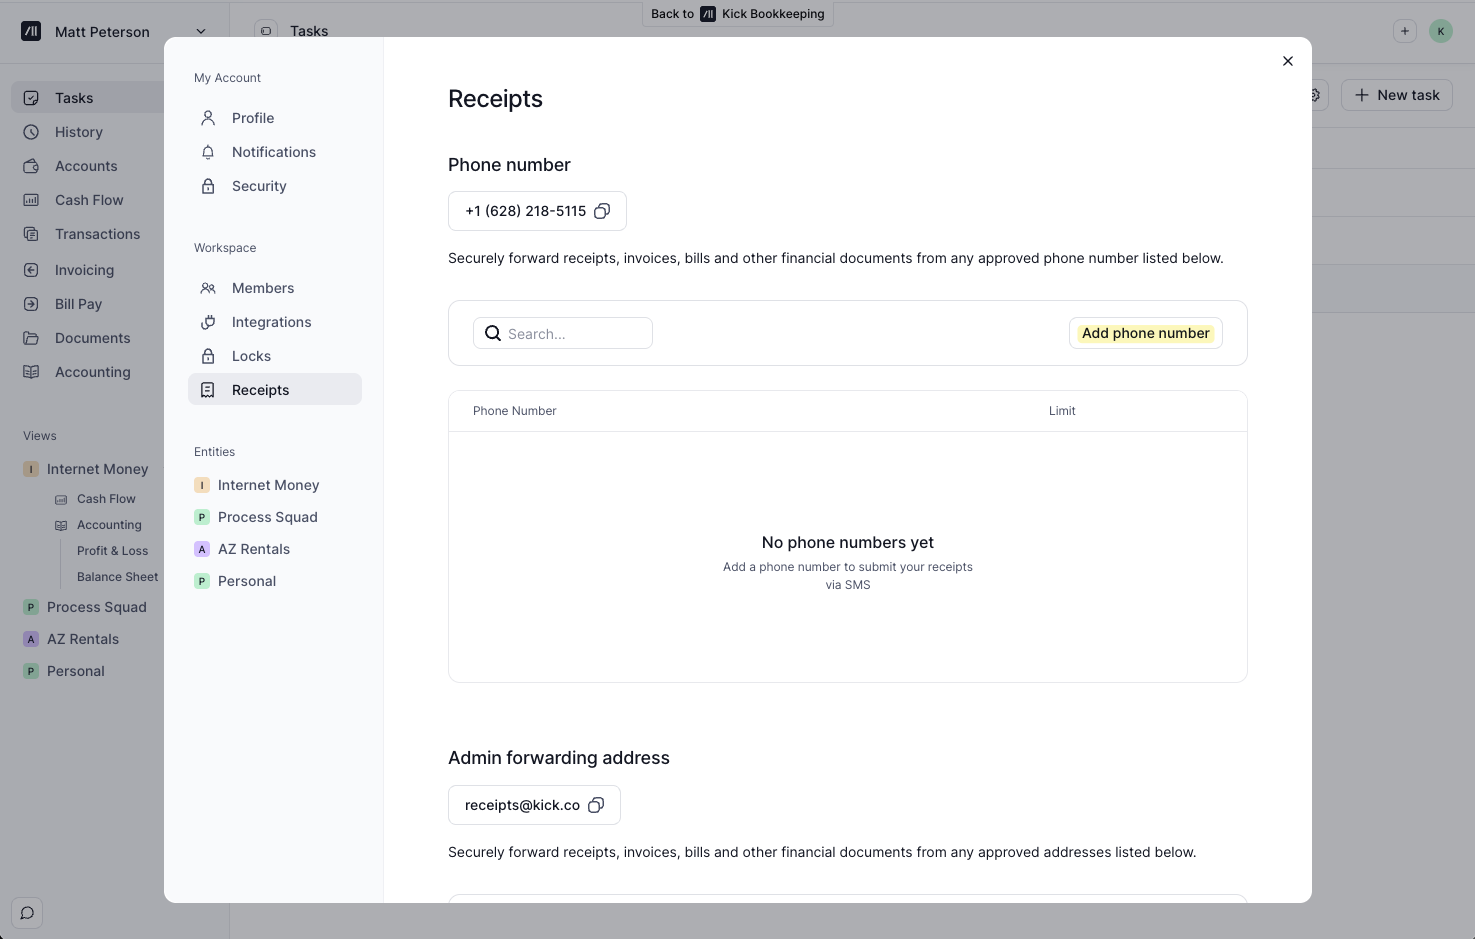
To start, head over to the top-right corner, open your profile menu and navigate to Receipts.
Text Setup
Add your phone number(s) to start sending receipts via SMS and MMS.
Text forwarding supports the following file formats: JPEG, PNG, HEIC
Email Setup
You can forward or send any receipts via email from the email associated with your account. Within Receipts, you can add additional emails you would like to send receipts from by clicking Add email.
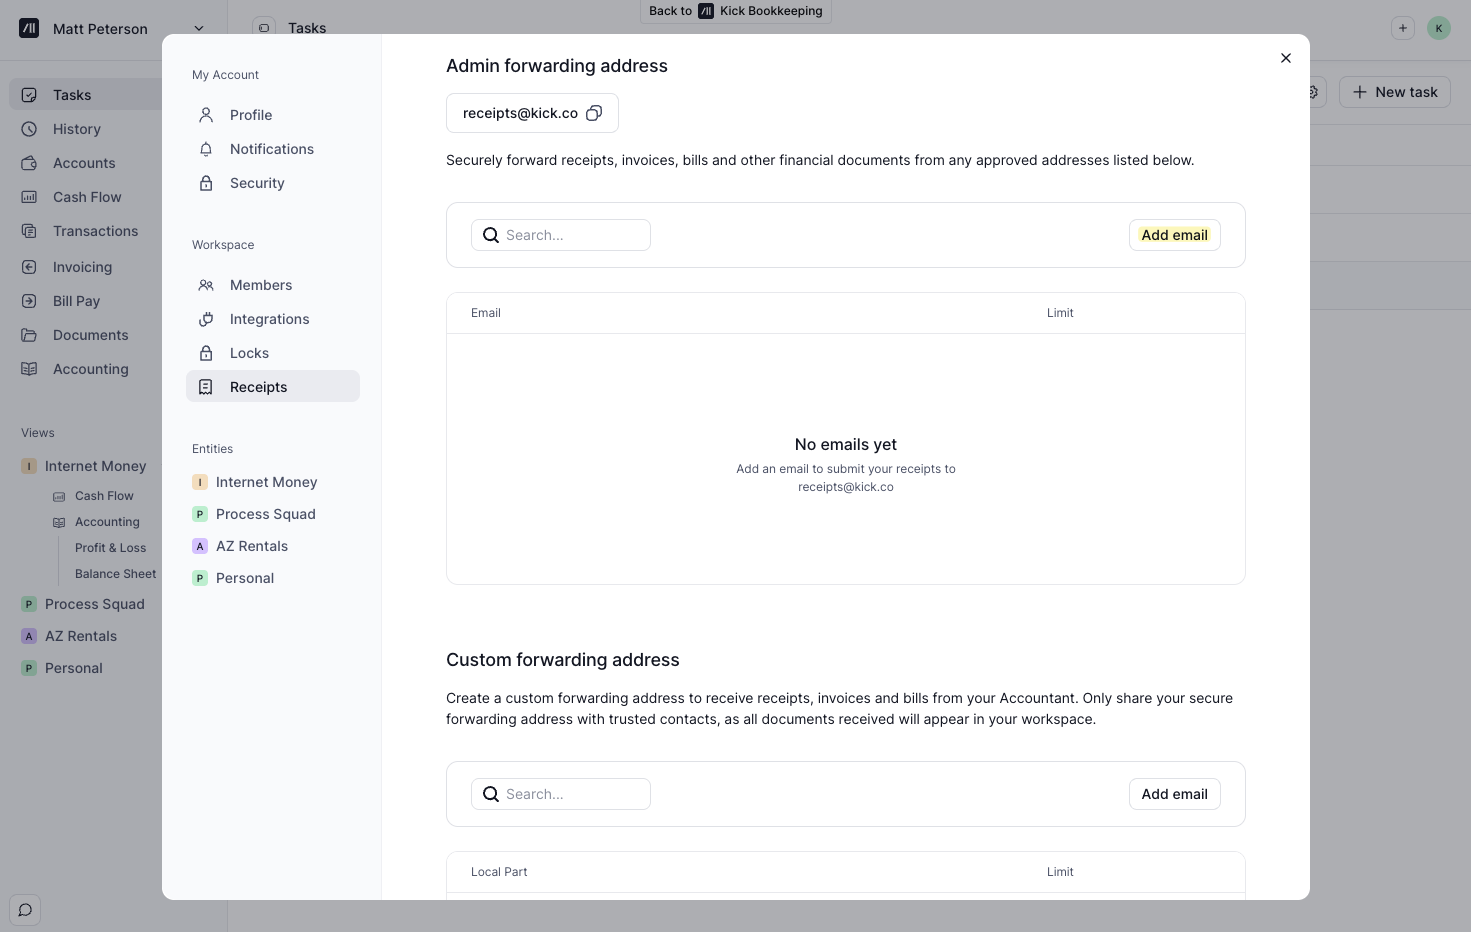
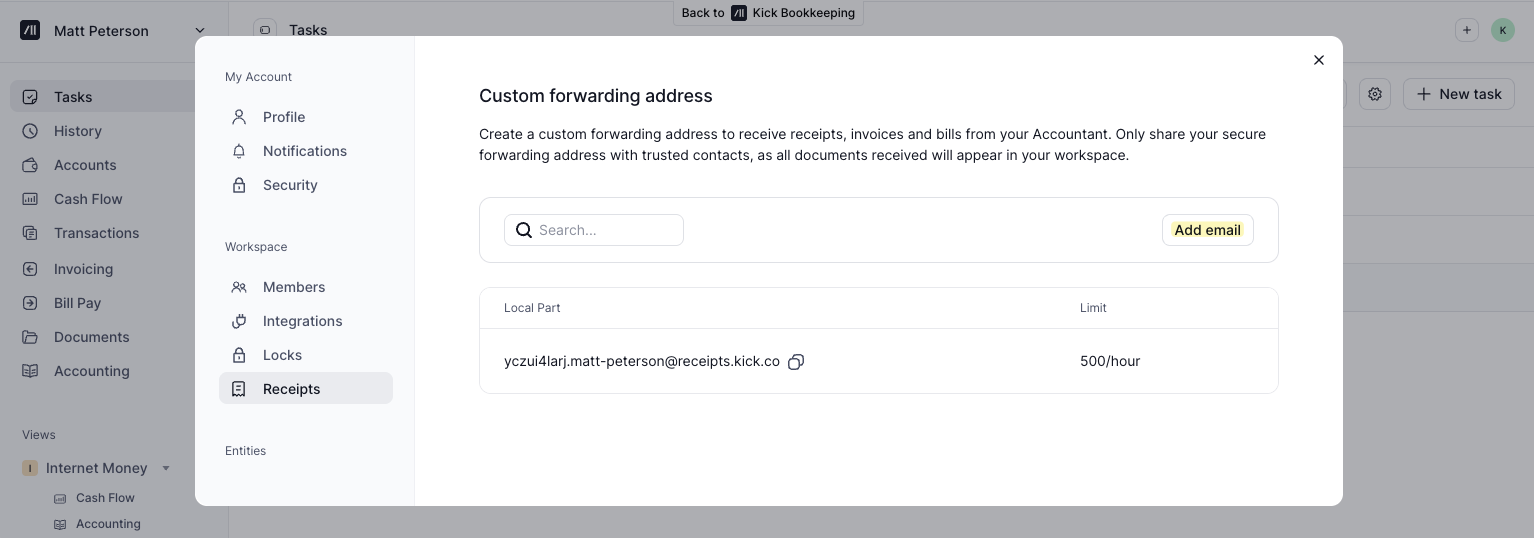
Custom forwarding address
You can also set up a custom forwarding address by clicking Add email. Once the address has been set up, you can share it with your Accountant or other relevant parties.
Note: Gmail may send a verification email to your custom Kick receipt email address when setting up forwarding. These verification emails are not displayed inside your Kick workspace like normal receipt emails, even if Kick successfully receives them. If Gmail cannot complete verification, try using one of Google’s alternate verification methods during setup. If forwarding still cannot be enabled, contact support with a screenshot of the error message and the step where setup gets stuck.
Documents Tab
No setup is required to upload receipts to the Documents tab. Navigate to the Documents tab from the sidebar, then drag and drop your receipts to upload them. From here, you can also match receipts to a specific transaction. → Jump to View or Match a Document or Receipt to a Transaction
How to Add Receipts to Kick
There are three ways to add receipts to Kick. Kick will automatically store it in the Documents tab and match it to the correct transaction once it settles in your account if possible.
Text a Receipt
Text the image to your Kick receipt to 628-218-5115. Please note: Mobile carriers often enforce size limits (typically 1–2MB per image), which may prevent larger files from sending via text.
Forward an Email Receipt
Forward any email receipt to receipts@kick.co. Email attachments have a 20MB size limit per attachment.
If an email has no attachments, Kick will store the email contents as a PDF.
Drag and drop receipts to the Documents tab
Locating Your Uploaded or Emailed Receipts
There are two ways to view the receipts that you have uploaded or emailed:
You should see any receipts attached to the transaction (if matched) by heading to Transactions via the sidebar. Click on the matching transaction and the receipt(s) would be under Actions.
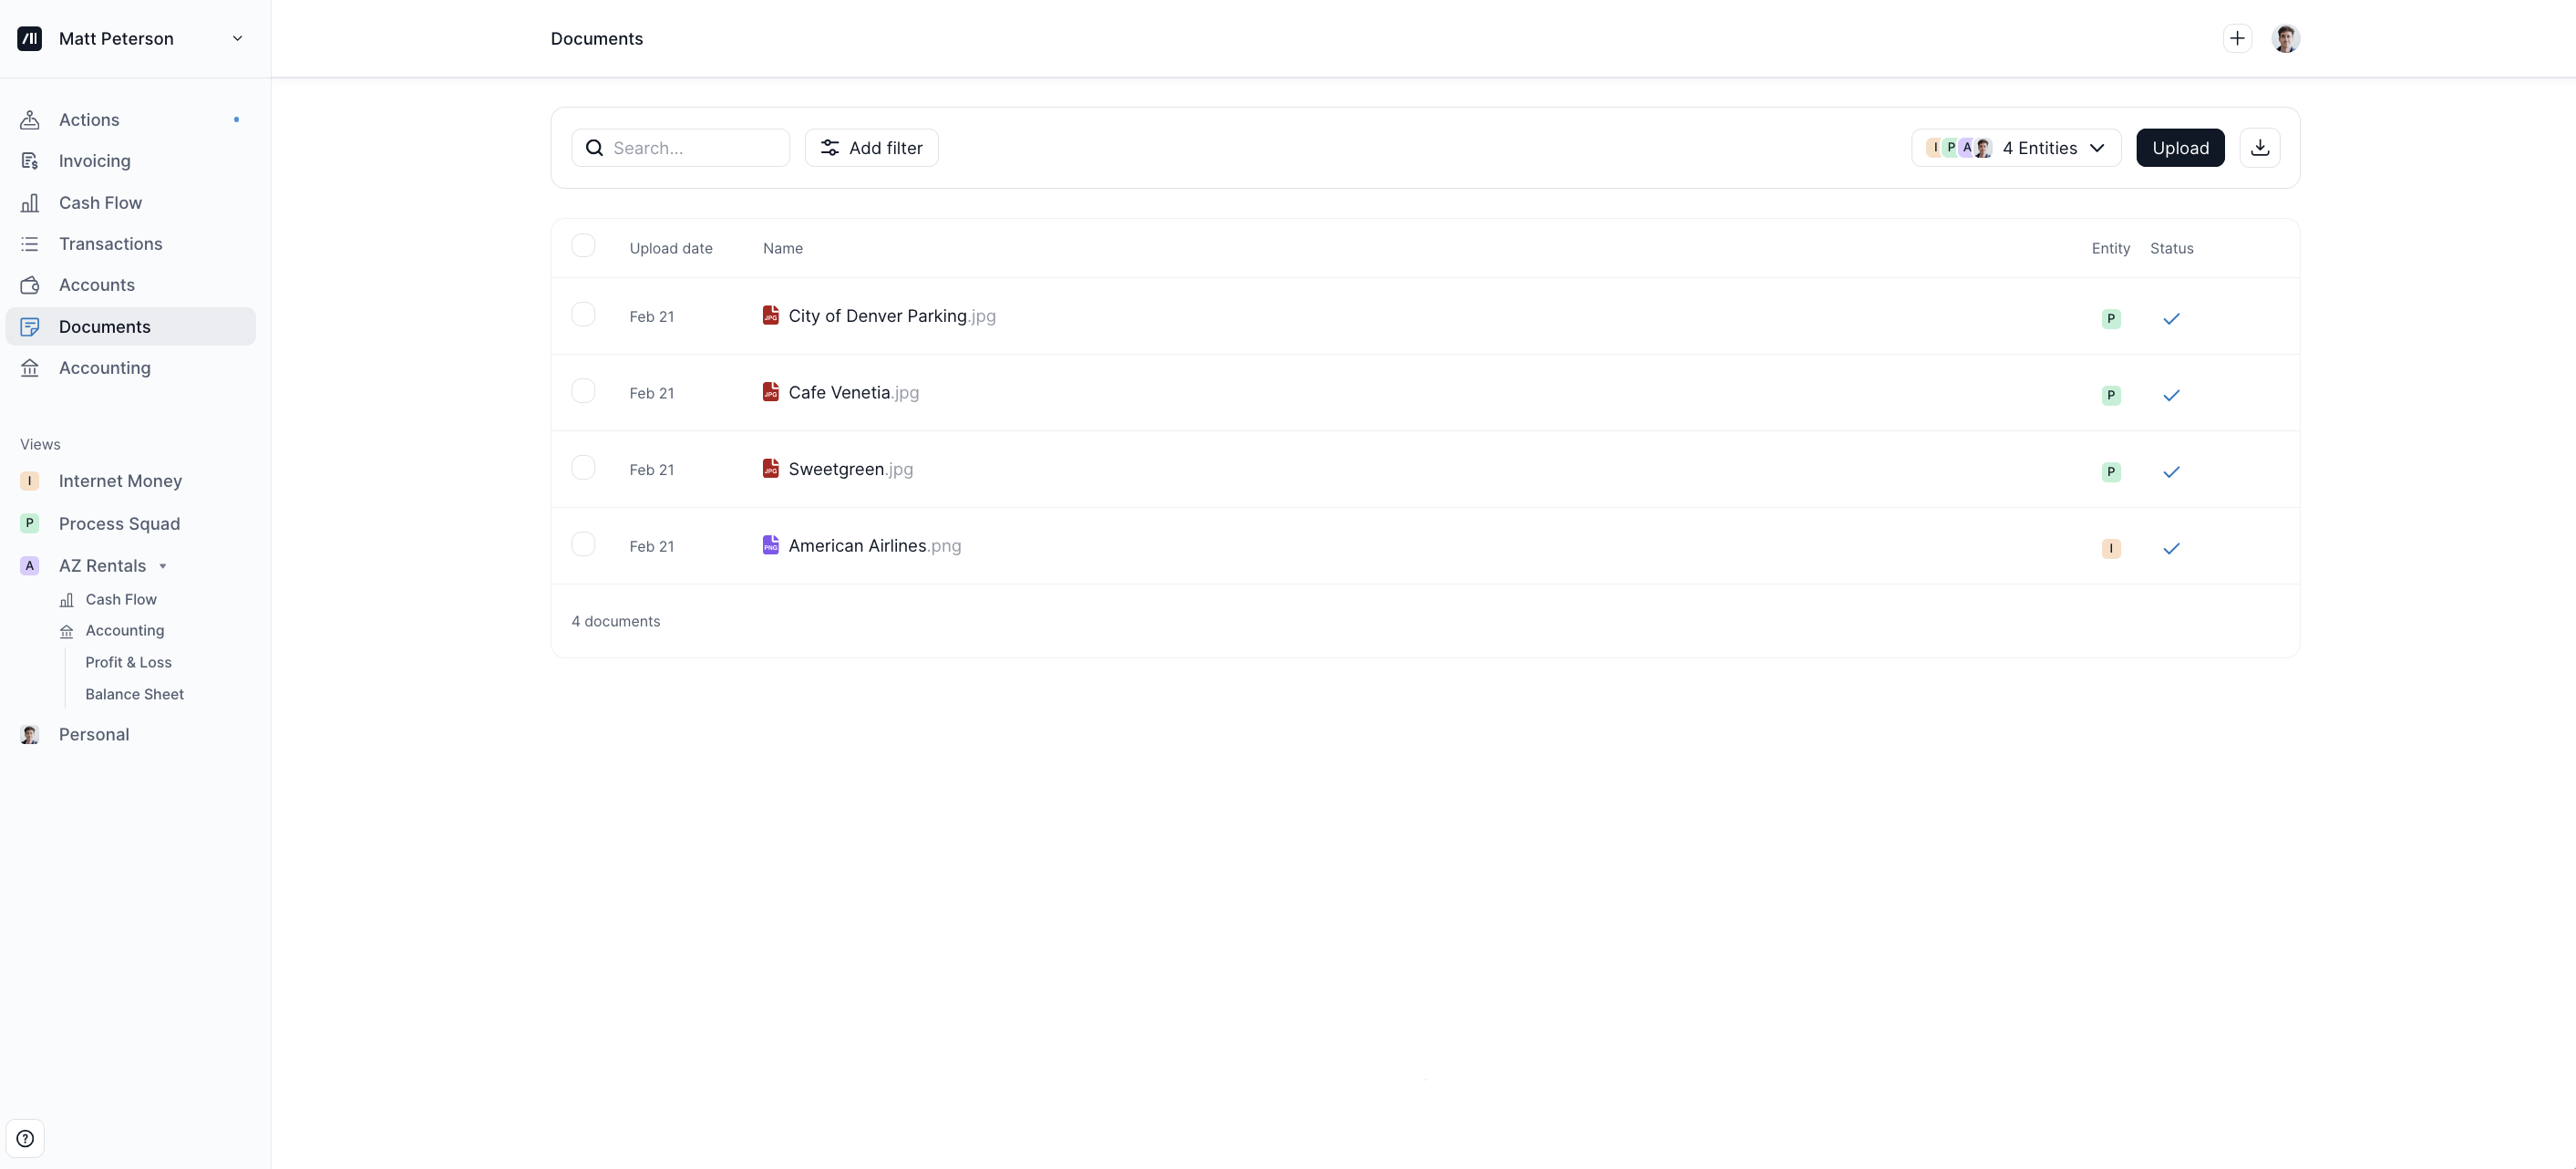
You can also see all the receipts by heading to Documents via the sidebar and manually match them if desired.
Splitting receipts
To split receipts, locate the transaction that it is attached to by heading to Transactions via the sidebar. Click on the transaction and then click on the Split icon at the bottom of the right sidebar. For more detailed steps on how to split a transaction, click here.
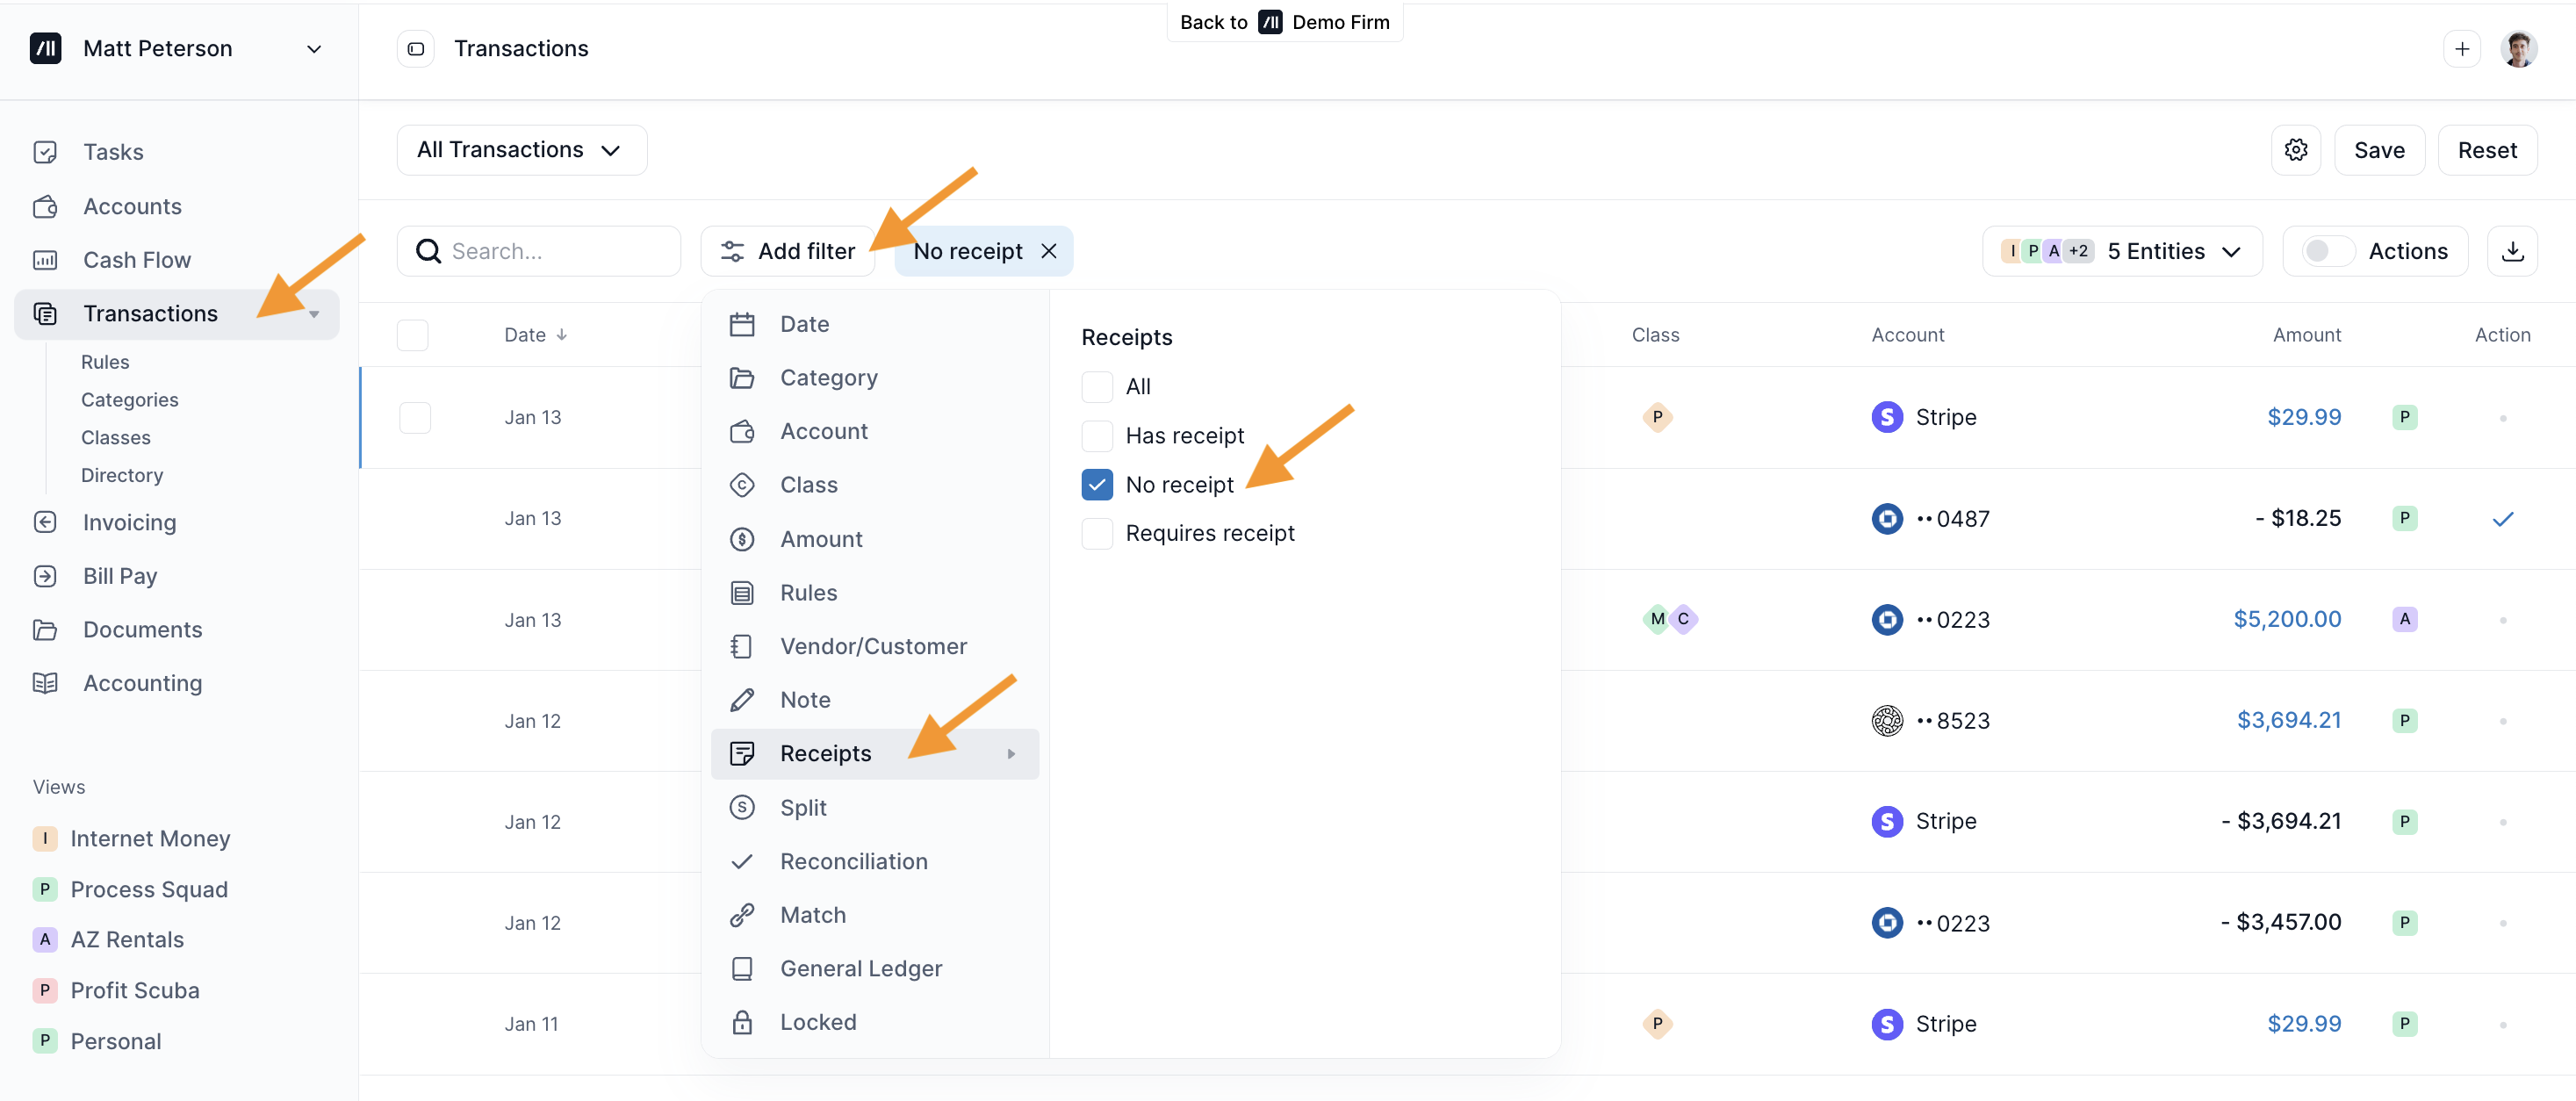
How to Find the Transactions that are Missing Receipts or Have No Receipts
To find all the transactions that are missing receipts, head on to Transactions from the sidebar then click on Add Filter → Receipt → Tick on No Receipt.